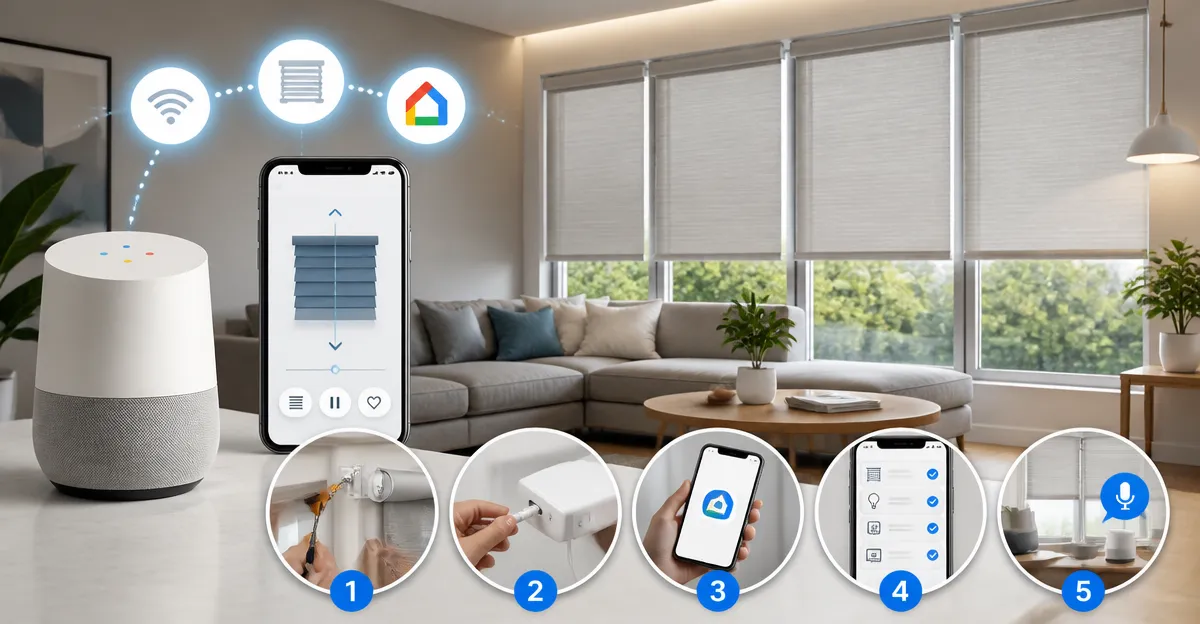
How to Integrate Smart Blinds with Google Home: Step‑by‑Step Guide
Introduction
Modern homes increasingly rely on voice‑controlled window coverings to improve comfort, energy efficiency, and privacy. This guide explains how to install smart blinds, link them to Google Home, and create automated routines that respond to sunrise, sunset, or temperature changes. By following each step, readers will gain a reliable, hands‑free solution for managing natural light without sacrificing style.
What You'll Need
- Compatible motorized blinds (see product recommendations below)
- Smartphone with Google Home app installed
- Wi‑Fi network with internet access
- Optional: a hub or bridge if the blinds require one for cloud integration
- Basic tools – screwdriver, measuring tape, and a level
Step‑by‑Step Instructions
1. Choose the Right Smart Blinds for Your Windows
Select blinds that match the mounting style of your windows and support Google Home integration. Three highly rated options are available:
- Hapadif Motorized Blinds – Cordless, no‑drill installation, blackout fabric, and built‑in AX290 motor that works with Alexa and Google Assistant via a smart bridge. Price: $89.60, Rating: 4.4/5 (546 reviews).
- SwitchBot Smart Blinds Kit – Includes three blind‑tilt units, a Hub Mini, solar charging panel, and precise 2° adjustment. Price: $164.99, Rating: 4.4/5 (810 reviews).
- Kincmo Motorized Blackout Blinds – Four‑layer blackout fabric, Matter/Thread connectivity, and silent operation. Price: $115.99, Rating: 4.8/5 (224 reviews).
Each product offers a distinct advantage: Hapadif provides a quick no‑drill mount, SwitchBot adds solar power for low‑maintenance operation, and Kincmo delivers the highest blackout performance with advanced Matter compatibility. Choose the model that aligns with your window type and preferred power source.
2. Install the Blinds Physically
Follow these general installation steps, adapting them to the specific hardware of the chosen blinds:
- Measure the window opening accurately. For inside mounts, leave a 1‑2 cm clearance on all sides; for outside mounts, add 6 inches to width and height.
- Attach the mounting brackets using the supplied screws. Hapadif uses an adhesive extension block that slides into the upper rail, eliminating the need for drilling. SwitchBot and Kincmo require bracket screws but include pre‑drilled holes for quick alignment.
- Insert the motorized rail into the brackets. Ensure the battery compartment (Hapadif) or solar panel (SwitchBot) is oriented for easy access.
- Secure the fabric panel to the rail, then test the manual remote or app control to confirm smooth movement.
All three products are designed for a setup time of under 30 minutes for a single window, making them suitable for DIY installation without professional assistance.
3. Connect the Blinds to Google Home
The connectivity method depends on the blind’s ecosystem:
- Hapadif Motorized Blinds: Install the AX290 smart bridge (sold separately). Open the Hapadif app, add the blinds via Bluetooth, then enable Google Assistant in the app’s integration settings. Once linked, the blinds appear as a controllable device in the Google Home app.
- SwitchBot Smart Blinds Kit: Use the SwitchBot Hub Mini included in the kit. Download the SwitchBot app, add each Blind Tilt, and press “Add to Google Home” from the hub settings. The hub translates Bluetooth commands to cloud‑based Google Assistant control.
- Kincmo Motorized Blackout Blinds: Kincmo utilizes Matter, which Google Home supports natively. Open the Google Home app, select “Add Device,” and choose “Matter.” Follow the on‑screen QR‑code scan to pair the blinds instantly, without a separate hub.
After pairing, rename each blind in Google Home (e.g., “Master Bedroom Shades”) to simplify voice commands.
4. Create Automated Routines and Scenes
Automation maximizes the convenience of smart blinds. Use the Google Home app to set up the following common routines:
- Sunrise Wake‑Up: Schedule the bedroom blinds to open 15 minutes before sunrise. This gently introduces natural light, reducing reliance on alarm clocks.
- Evening Privacy: Create a “Good Night” routine that lowers all living‑room blinds at sunset and sets the thermostat to a comfortable temperature.
- Energy‑Saving Mode: Link blinds to a temperature sensor. When indoor temperature exceeds a threshold, close the blinds to block solar heat and reduce cooling costs.
Each routine can be triggered by voice (“Hey Google, good night”) or automatically based on location, time, or sensor data.
5. Test and Refine Your Setup
After configuring routines, perform a full test:
- Use voice commands to open, close, and set a specific percentage (e.g., “Set living‑room shades to 30 percent”).
- Verify that scheduled routines execute at the correct times on weekdays and weekends.
- Observe battery levels or solar charging status via the respective app to ensure sufficient power for daily operation.
If any blind fails to respond, revisit the troubleshooting section below.
Tips & Pro Tips
- Battery Management: For battery‑powered blinds (Hapadif, SwitchBot, Yoolax), replace AA batteries annually or rely on the optional solar panel to extend runtime.
- Calibration: Most apps include a calibration routine that defines fully open and fully closed positions. Run this after installation to prevent over‑travel.
- Grouping: Use the SwitchBot app’s group feature to control multiple blinds with a single command, reducing voice‑command clutter.
- Safety: Ensure cords are completely removed or hidden to prevent child or pet entanglement. All recommended products are cordless.
- Network Stability: Place hubs near the Wi‑Fi router to minimize latency. A 2.4 GHz band provides the most reliable connection for Bluetooth‑based devices.
Troubleshooting
| Problem | Possible Cause | Solution |
|---|---|---|
| Blinds do not respond to Google Assistant | Device not linked or hub offline | Open the Google Home app, verify the device status, and re‑authenticate the hub or bridge. |
| Slow movement or stalling | Low battery or obstructed rail | Replace batteries, clear the rail, and run the calibration routine again. |
| Solar panel not charging | Outdated firmware (SwitchBot) or insufficient sunlight | Update firmware via the SwitchBot app and position the panel for direct exposure. |
| Voice command sets wrong angle | Incorrect “open” vs. “close” orientation | Adjust the calibration direction in the app; for SwitchBot, set “open up” as the fully open position. |
Conclusion
Integrating smart blinds with Google Home transforms everyday lighting into an automated, energy‑efficient experience. By selecting a compatible product, installing it correctly, linking it through the appropriate hub or Matter protocol, and configuring routines, one can enjoy hands‑free control that adapts to daily rhythms. The steps outlined above provide a reliable framework that can be replicated for any number of windows, ensuring consistent comfort throughout the home.
Products Mentioned in This Guide
Frequently Asked Questions
How do I connect my smart blinds to Google Home?
Open the Google Home app, tap Add → Set up device, select the blind’s brand, and follow the on‑screen prompts to link the accounts.
Do I need a hub to use smart blinds with Google Home?
Only if the blinds require a proprietary hub; many Wi‑Fi models connect directly without extra hardware.
Can I schedule my blinds to open at sunrise and close at sunset?
Yes, create a routine in Google Home or use the blind’s native app to set sunrise/sunset triggers for automatic adjustments.
What Wi‑Fi requirements are necessary for reliable blind operation?
A 2.4 GHz network with stable internet and a signal strength of at least –70 dBm at the blind’s location is recommended.
How do I troubleshoot a blind that isn’t responding to voice commands?
Check that the blind is online in the Google Home app, ensure the voice command matches the device name, and verify the Wi‑Fi connection before restarting the blind or router.